To begin using your new Sungale Cloud Digital Photo Frame, you first need to register your device, follow the steps below to get started:
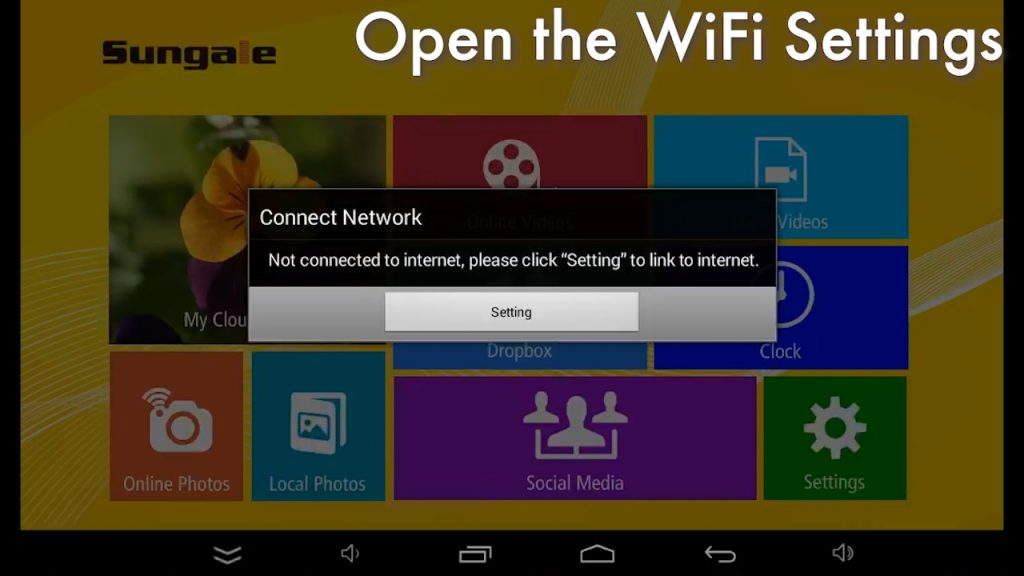
1. When connecting your device to power, you will receive a notification on your device screen, as shown below:
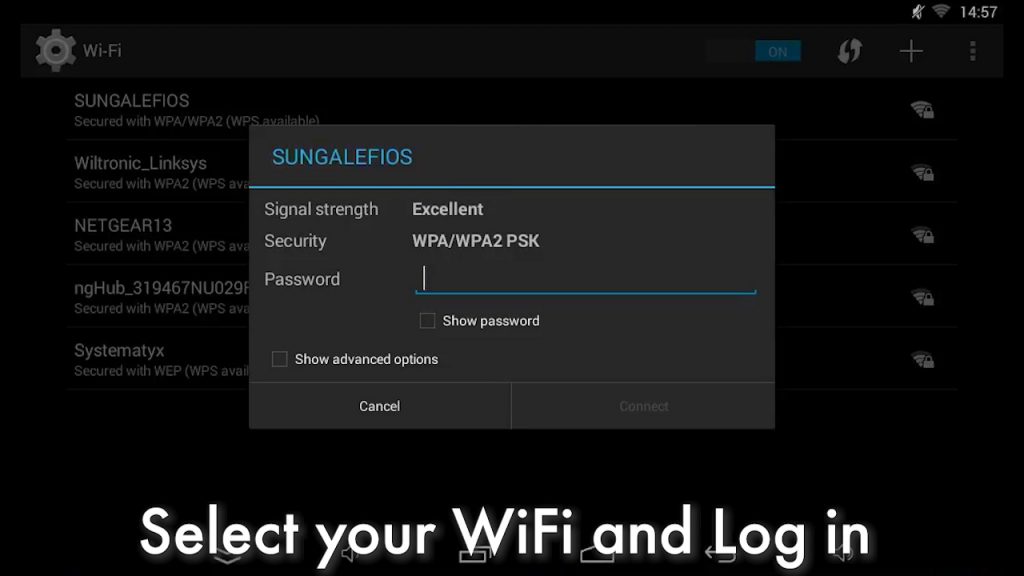
2. Tap the Setting button to enter the Cloud Frame’s WiFi Settings. You’ll need to log into your WiFi connection in order to register the frame, send Cloud Albums and use apps.
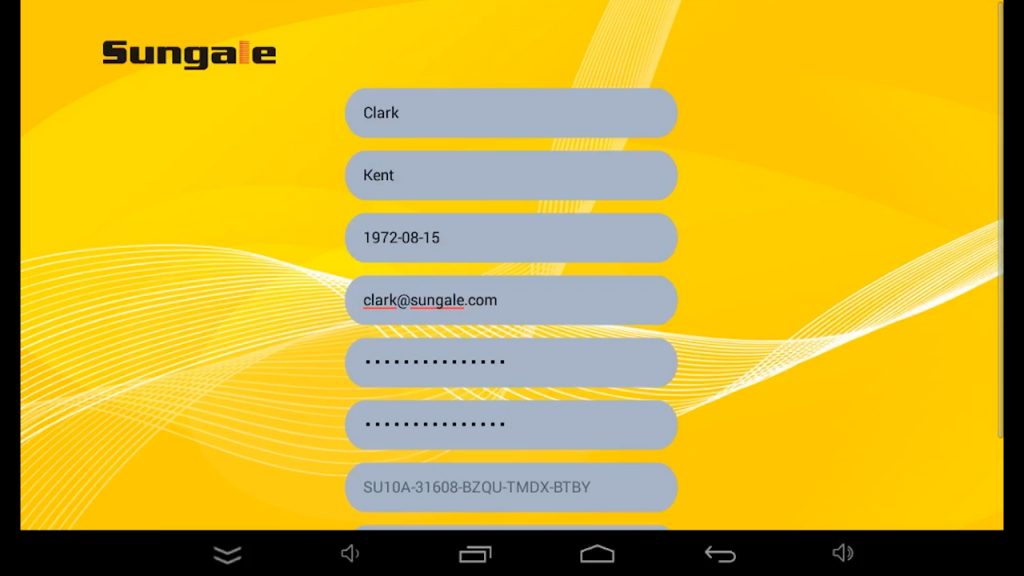
3. Now select “My Cloud Album”. A registration prompt will appear for you to create an account. Enter your information and once you’ve finished, hit “Submit” to send the form.
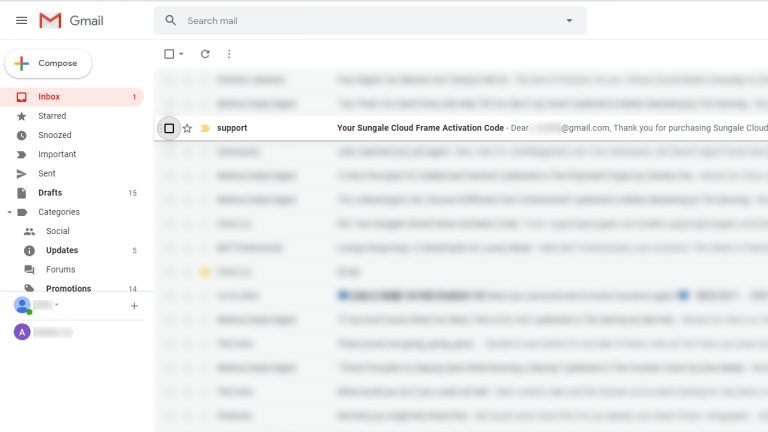
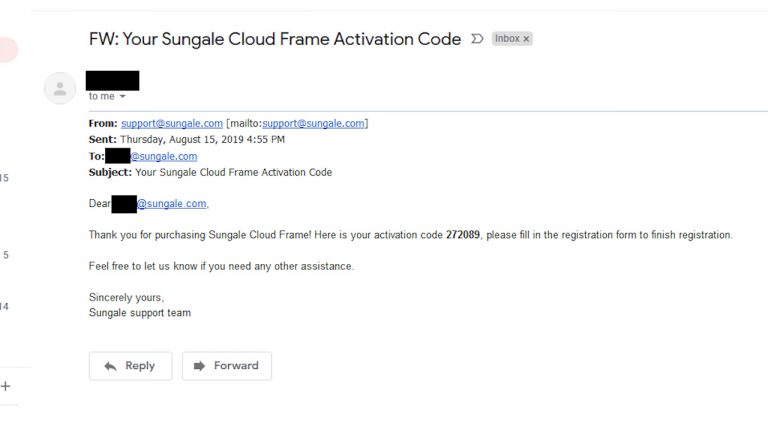
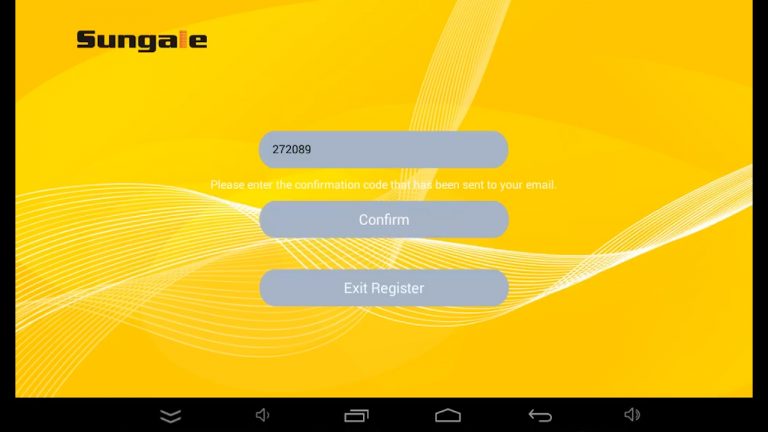
4. After pressing the “Submit” button, you will receive a message from the Sungale team with the activation code to the email address you provided. Once you have the code, you can copy it over to the frame and complete the registration.
Previous
Next
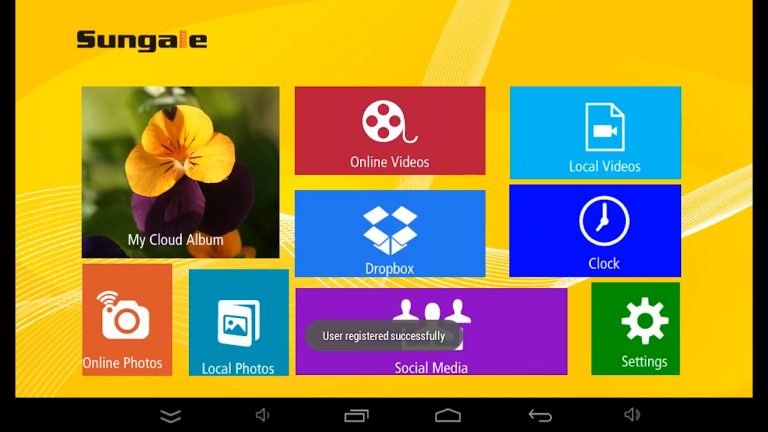
Once you’ve copied it over and selected “Confirm”, then your Cloud Frame will be registered! Congratulations! Now you’re ready to start uploading Photos! See the below Blog Post on how to download and use the Sungale Cloud App for instructions on how to create Cloud Albums! There’s also another two useful posts on how to operate your Cloud Frame.