The community center is an online album where all of the Cloud Frame users can share their photos. Did you capture an awesome photo of the ocean? You might want to show it off with other members! If you decide you want to be part of the community, follow these steps:
-
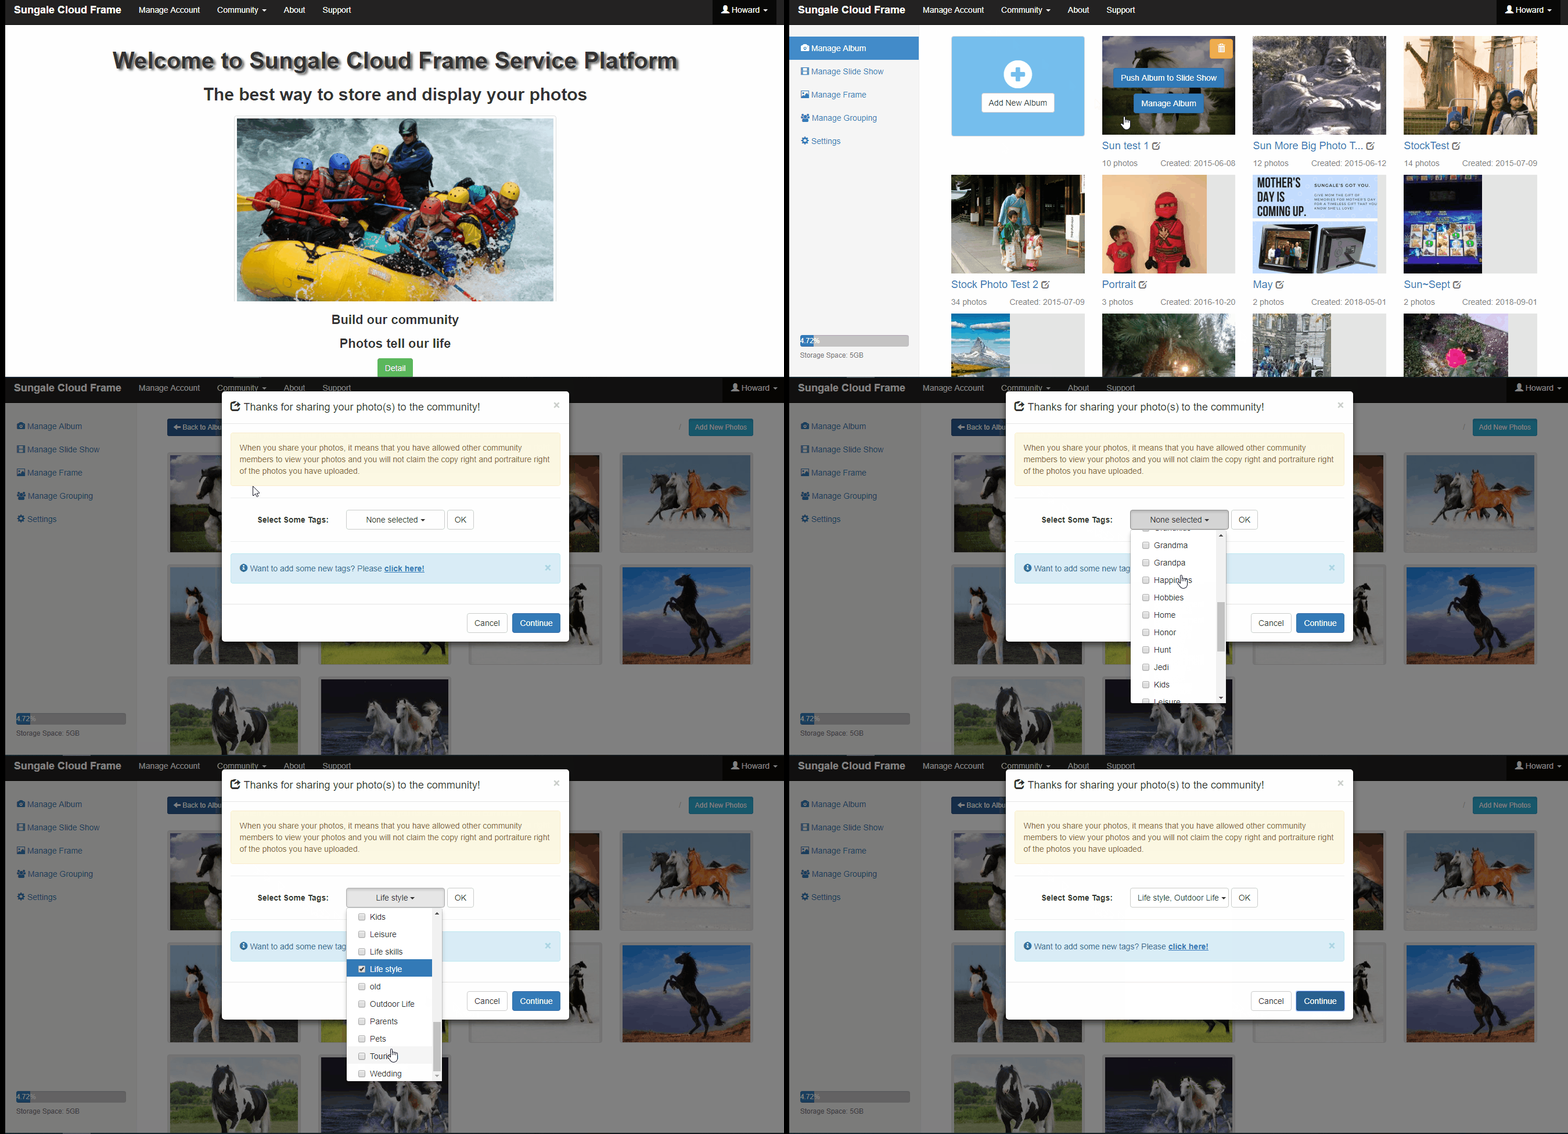
Log-in to the cloud frame management platform
-
Go to “Manage Account” and select the photo you would like to share with the Cloud Frame community (Note: Your photos will not be sent directly to their device, but they will be shared in the management portal for everyone to enjoy. Your photo privacy matters that is why we do not utilize them for advertising purposes.)
-
Click “Share This Photo” and select tags from the drop-down menu. You can select up to 5 tags from the drop-down menu. The tags organize each photo by category for an easier navigation. (Note: If your photo doesn’t pertain to the selected categories, you can create a new tag by selecting “Click Here!” next to, “Want to add some new tags”)

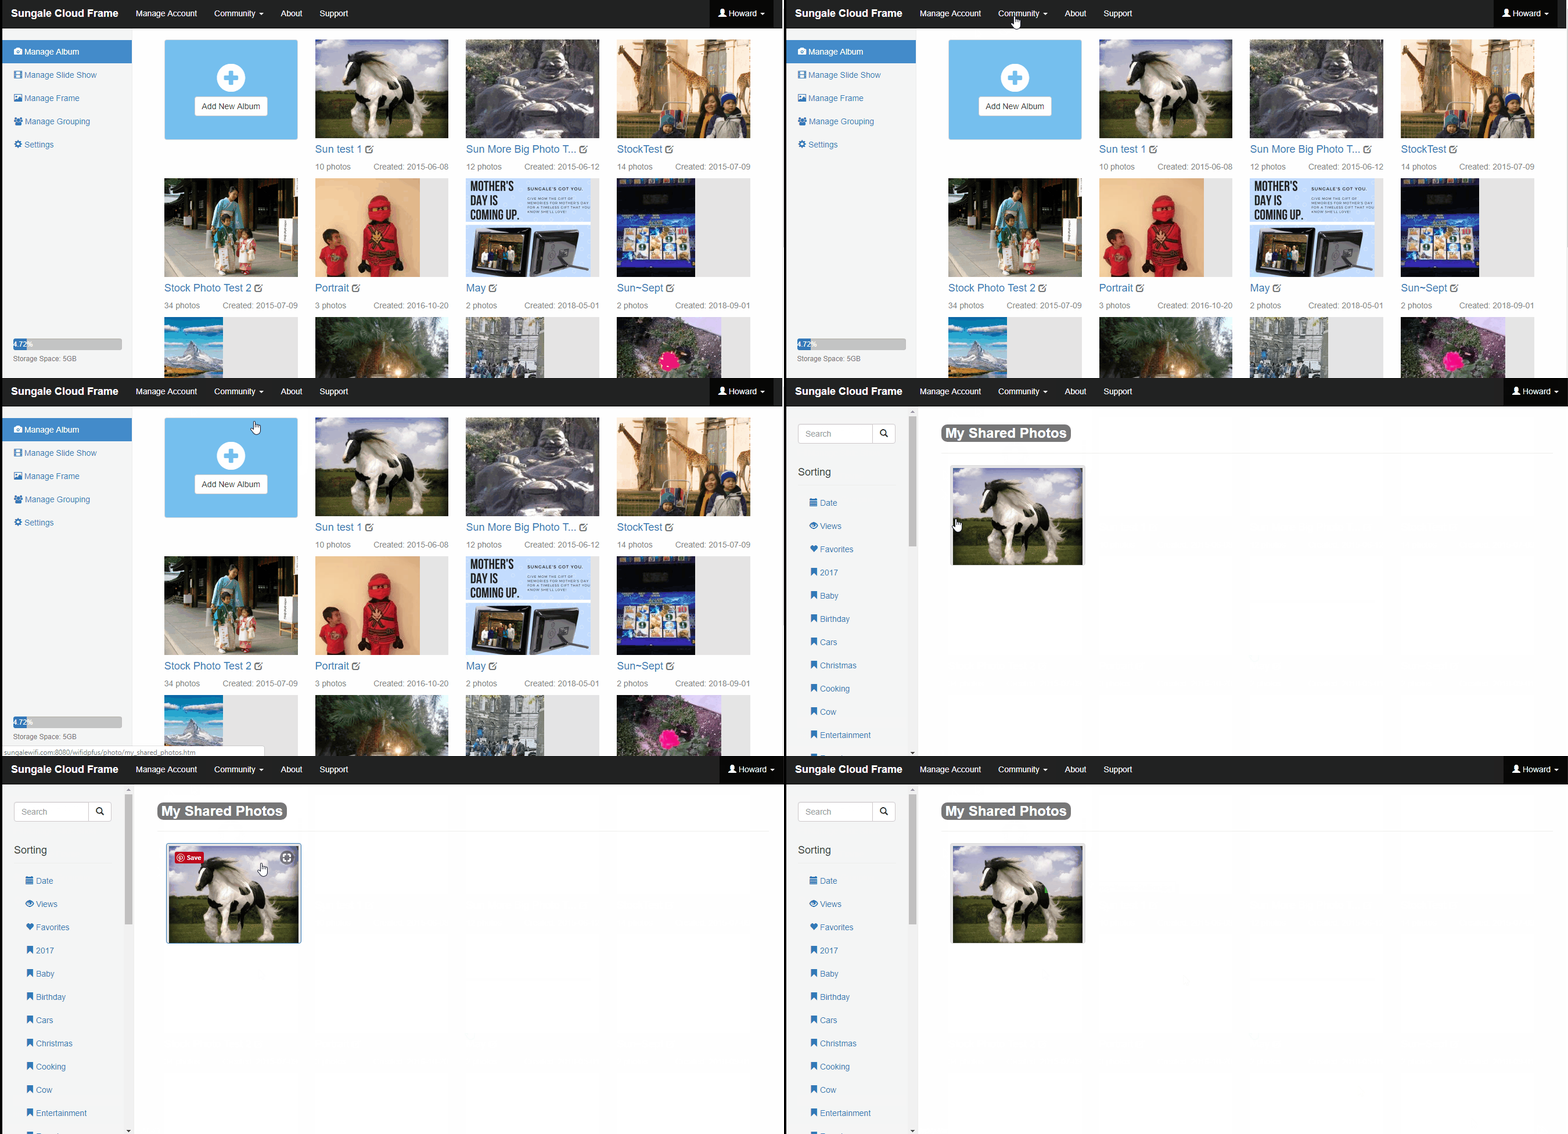
To check the photos you have shared with the community:
-
Go to “Community” and select “My Shared Photos” here, you will find all of the photos you have shared

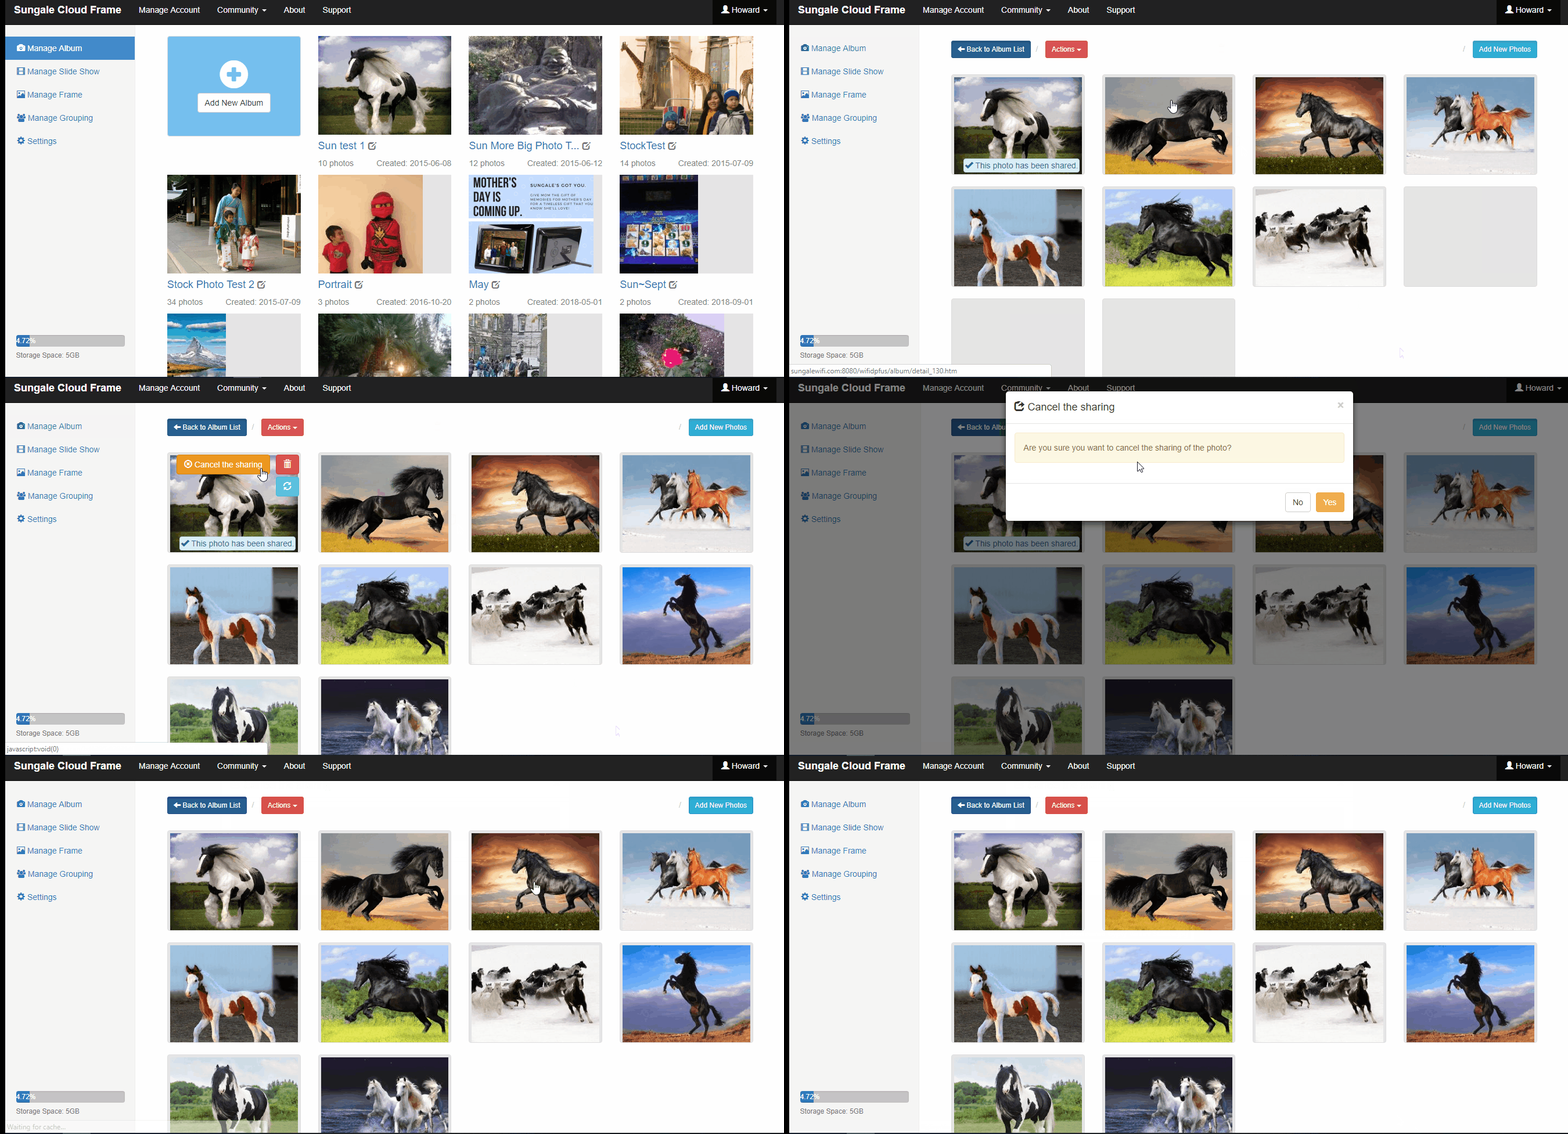
If you decide you no longer want to share your photo you can cancel the share:
-
Go back to “Manage Account” and find the shared photo
-
Click “Cancel This Share” and your photos will be deleted from the community album

Please follow and like us:
